
Introduction
Note: This tutorial assumes that you have a basic familiarity with Scratch terminology and using Scratch. If you’re new to Scratch, I strongly suggest that you check out our “Introduction to Animation and Movement” activity before doing this one.
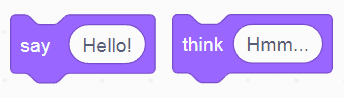
While Scratch can be used to tell stories and create interactive experiences, it falls short in tools to support doing so. There are two ways to display text, which are essentially the same. These are the “Say text” (or “Say text for seconds”) and “Think text” (“Think text for seconds”), pictured below.
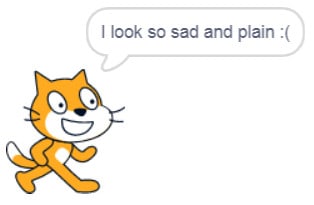
These blocks can be used to display either a speech bubble or a thought bubble, both of which are placed depending on the location of the sprite that uses the blocks. The text bubble is pictured below.
While these are fine for basic text display, if you want to use a custom font or display text in a custom manner, that is, of a different size, on more than one line, or in a place that isn’t determined based on the location of the sprite, you have to make a custom solution.
In this tutorial, you will build one such solution which you can then adapt for your own needs. There are two resources for this project:
- A starter project that can be remixed (if you’re using Scratch online) or downloaded (if you’re using Scratch offline) and contains a font which I quickly drew. You can use this if you don’t want to make your own font just yet.
- A completed version of the code for you to study. I strongly recommend trying to follow along and build the code yourself, before taking a look at the completed code.
In addition to building on your previous Scratch knowledge, this tutorial will introduce you to clones and how they can be used to solve the problem at hand.
Download Projects
Vocabulary
Clone (Scratch) – A clone in Scratch is a copy of a Sprite that is made using the “Create clone of” control block.
Computer Activity
The starter project
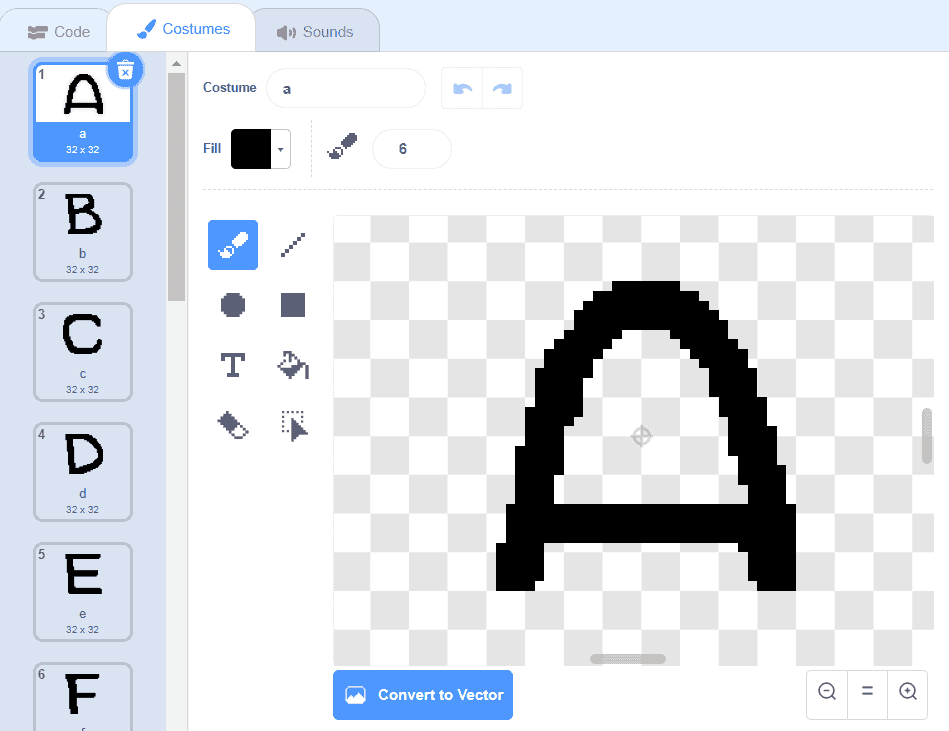
These instructions assume that you will be using the starter project for this tutorial. This means that you’ll already have a sprite that has a costume for each letter, plus a costume for some punctuation marks. While the starter project is already setup correctly, you should note a couple things about the “writer” sprite (the only sprite in the project) and its costumes:
- There is a costume for each letter.
- Each letter’s costume name (set in the “Costume” space at the top, above “Fill”) is the letter that it is. For example, the name of the costume for the letter “A” is “a”.
- Each letter is about the same size. The crucial dimension is width, because this is how far apart your letters will be spaced out. In the starter project, at full size, each letter is about 32 pixels wide.
- The letters are only uppercase. This is important because you’d need extra letter costumes to be able to display both uppercase and lowercase.
The problem: displaying fancy text
With the art challenge (mostly) out of the way, we can take a look at the coding challenge: how do we display our custom art instead of the plain text of the speech bubble? When I come across a challenge that might seem complex, I try to break it down into smaller pieces to see if I can solve any of the smaller parts of the problem first, eventually tackling the parts that I don’t (yet) know how to do. Being able to do this quickly is based on your experience, both with Scratch and outside of Scratch. I approached this problem by starting with what I knew, based on my experience with Scratch: If I’m trying to display custom styled text in Scratch, I can’t use the normal ways of displaying text, which use the built-in blocks of “Say text” and “Think text”. Considering that limitation led to three questions:
- How could I display custom letters without using those blocks?
- How can we read text in Scratch?
- How might we write and position the text?
The solution I came up was based on answering each of these questions:
- I can display custom art, including letters, as a sprite and different variations on a sprite, like letters of the alphabet, would be like sprite costumes. This would use blocks in the Looks category.
- I can read and manipulate text in Scratch, letter by letter, using blocks in the Operators category.
- I can write and position text on the Scratch stage mainly using blocks from the Motion category and some blocks from the Control category (for clones).
Displaying the custom letters
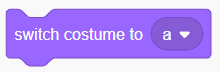
Because of the way that the starter project is setup, with one sprite that has costumes for the alphabet, and each costume named for the character it represents, if you want to display a custom letter, you need only to use the “Switch costume to” block from the Looks category and give it the letter that you want. For example, to switch to a fancy “A”, you would use:
This naturally leads into the second part of the problem and solution: how do you specify the letter used for “Switch costume to” based on the letters in a line of text?
Reading letters from text
To read letters from text, you will need to take your text and read it character by character. Each character, then, assuming that the custom letter font has a costume for it, can be switched to using the method above. My solution is based on two blocks from the “Operators” category:

Looking at the first block, if I were to give it a number (e.g. 2) and some text (e.g. “Hello!”), it would give me back the second letter of the text, “e”. This is exactly what you need to use, but you need to make it repeat as many times as your text is long (in characters). The second number will give you the length of your text. I want you to try and make the code that will read each character, before looking at the solution below.
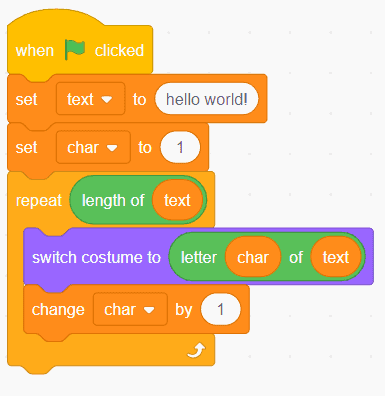
While that code might look a bit complex, you can imagine how as you become more experienced, you would be able to more quickly identify and put together the blocks in Scratch that will do what you want. Consider the following about the code:
- My text is all lowercase. This solution will only work with lowercase letters. If you want it to work with both, try writing code that can convert text to all uppercase or lowercase before it is used (I am not covering it in this tutorial, but it’s a good exercise for you to try).
- I’m using a variable for text. This is actually optional, but saves me from repeating the actual text twice, in the “Length of text” block and the “Letter # of text” block.
- I use the Control block “Repeat” and have it repeat as many times as there are letters in the text provided. This means it will repeat once for each letter.
- I have a counter called “char” which is a number that is referring to which character in the text is being looked at by the “Letter # of text” block. I start it at 1 and increase it by 1 each time the “Repeat” block is run so that every letter, from the first to the last, will be read.
If you run the code above, you will see your sprite cycle through each letter in your text, but not actually write any of them. This is because my solution only changes to the letter but does not draw it or create a copy that stays after. In the next section, you will see how that is done using clones.
Writing and positioning text
For you to actually write text, instead of just cycle through the letters, you can either use the Pen extension and “stamp” it, or, as I will show, create a copy of your sprite, known in Scratch as a clone, for each letter. In the Control category, you can find the three clone blocks: “When I start as a clone”, “Create clone of”, and “Delete this clone”.

- “When I start as a clone” is a hat-shaped block, which means it is placed at the beginning of a stack of blocks. It runs when a clone is created, just as “When green flag click” runs when the green flag is clicked.
- “Create clone of” creates a clone of a given sprite. Clones run all the code that their original sprite would be running, except for two things: they also run “When I start as a clone” and they do not run “When green flag clicked”. That means that if you use any of the Events category blocks such as “When I receive message”, all clones will run the code for that event.
- “Delete this clone” deletes the clone that runs the block. Note: clones are automatically removed when you press the green flag button.
Each of these blocks provides something that I want for my solution. First, “Create clone of” is what you can use to create a copy of your sprite when it is a certain letter. Try writing code that uses “Create clone of” to write out a short bit of text. Don’t forget that you will also need to shift over by a certain amount to make sure your text doesn’t overlap or stack on top of itself. Once you have given that a shot, take a look at my solution below.
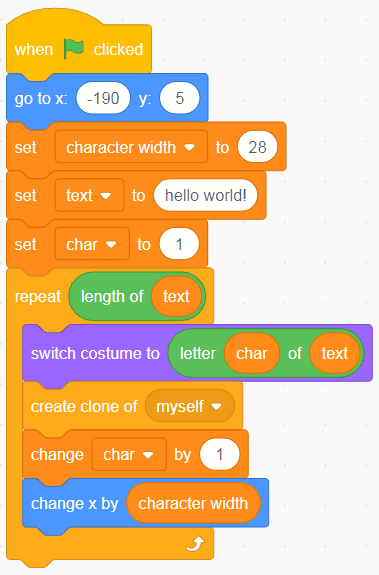
I want you to note a few things about the code above:
- I’m using a “Go to x and y” block to set the initial position of the sprite. Everything else ends up being relative to that position, that is, characters will be to the right of that position.
- I’m using a variable, “character width”, to set how far apart the characters should be. This number is related to the width of the sprite and costumes that I’m using. In my case, the sprite is 32 units wide, but I’m using it at 75% of its size, so I’ve picked a number that is a little larger than 32 x 0.75 = 24. The beauty of it being a variable is that it can be easily adjusted if the sprite size changes.
- I’m making one clone each time the repeat block runs, and that clone should use the costume of whatever letter it’s supposed to be.
- I’m changing the “x” position of the sprite by the character width that I set earlier to space out the letters. A positive character width means that the letters will be going in the positive “x” direction, or to the right.
Troubleshooting edge cases
This code is almost complete, but if you copy and run the code above, you’ll notice that it doesn’t print quite correctly:

Before reading the reason behind this issue, I want you to think about what might be happening here: What has been added? What has been missed? Thinking about those questions will help you troubleshoot both this problem, right now, and similar problems in the future.
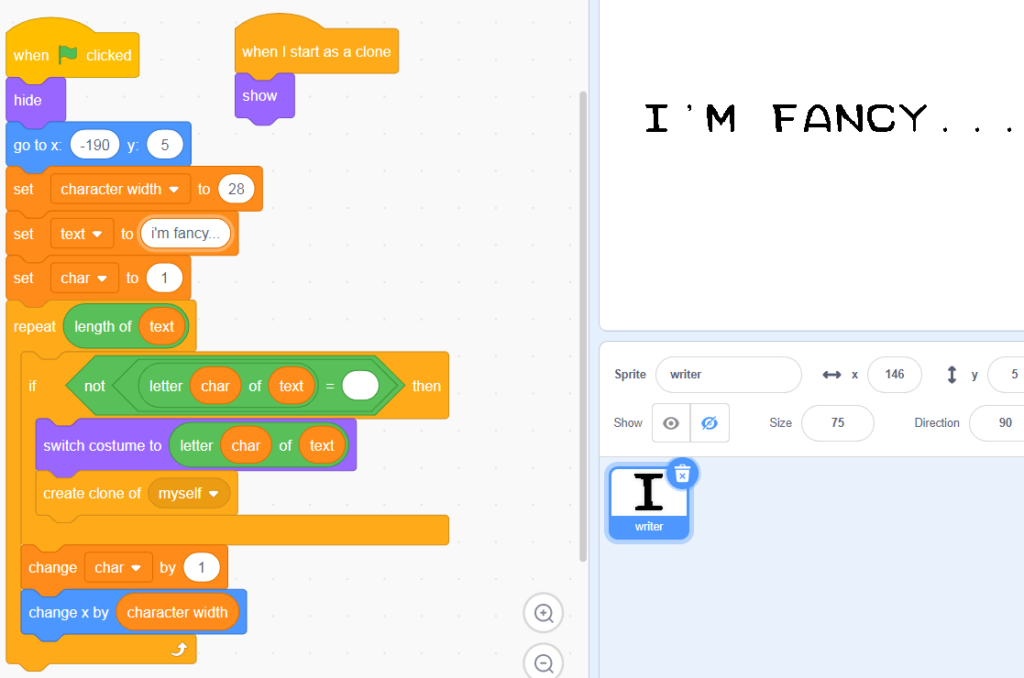
What you can see is that an extra “O” has been added in the middle and an extra “!” has been added at the end. The extra “O” is actually where the space should be in “hello_world!”. That’s because the solution above doesn’t have a character for the space, so it doesn’t change costumes and instead clones the costume that it was set on. You’ll need to add code to detect the space. The ending exclamation mark is also extra, but this is because it is our original sprite. You can get around this by “hiding” the original sprite and only “showing” the clones. I want you to try to do both yourself, but the second part is entirely new. You can see my solution below:
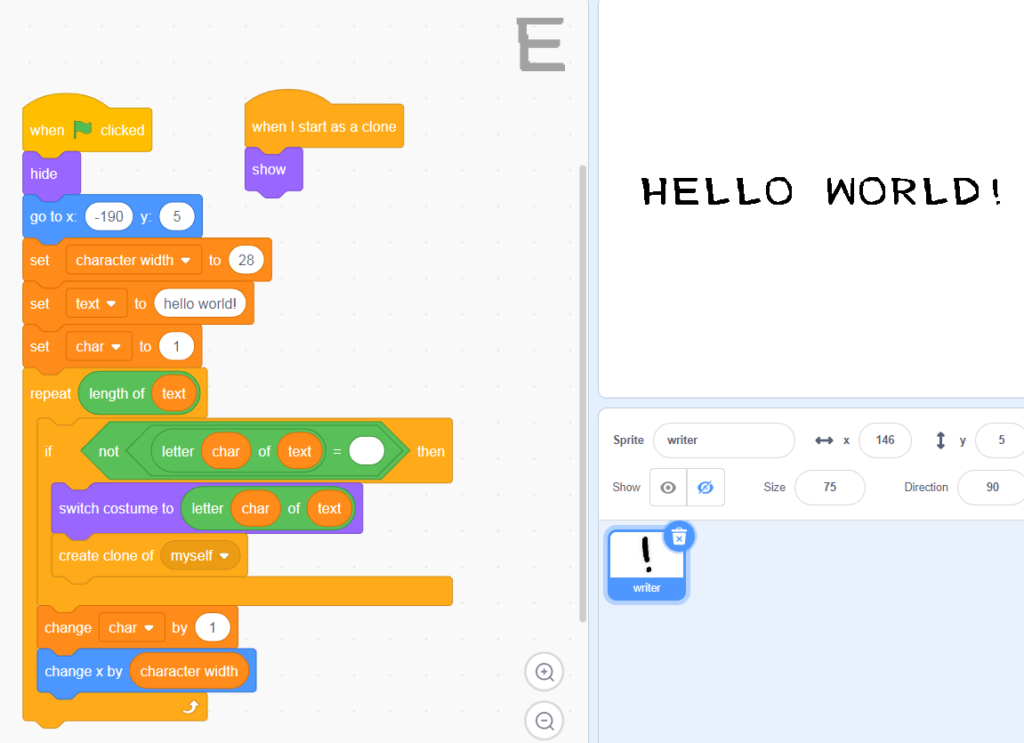
Much better! A few notes about the changes that have been made:
- There is an initial “Hide” block right after the green flag is clicked.
- There is a “Show” block under the “When I start as a clone” block. This means it will only run for clones, that is, only clones will show and the original sprite will stay hidden.
- I use an “If” block with three Operators blocks to make sure that the current letter is not a space. This means making sure that the current letter is not equal to “ “—you can’t see the space in the screenshot but it’s there..
Conclusion
We’ve solved the problem at hand, but there’s much more that can be done. I want you to think about how this solution can be improved. What other questions need to be asked? What other code might need to be written? For example, look at the screenshot below:
Punctuation marks in English typically are closer to the letters. As an extension, think about how you might make it so that the space between characters changes based on the current character. What blocks would you need to detect the characters? Also, think about how you might use this code in your Scratch projects. What would make this easier to use in terms of features? How might you write the code to make it easier to use? For an idea, see an example of a text box I’ve used for a different project:

What other ways could fancy text be used with Scratch projects?
Resources
- Scratch
- Scratch Wiki (Cloning)
- Learn Scratch with Pinnguaq! (Scratch Studio)